This is an advanced tutorial! Before reading this, it's best to have some more familiarity with ParseHub, especially with the Select tool. In your first project you definitely shouldn't need to use CSS selectors.
What do CSS Selectors do? How do they work?
CSS is a language that lets you select particular HTML elements from a page that ParseHub is on.
This can be more powerful or precise than ParseHub's default way of selecting elements (by clicking on them), but also requires some more coding knowledge.
If you want to learn some general CSS on your own, there's many tutorials available here.
Why should I use CSS Selectors?
In most cases, you shouldn't need to! However, there are a few cases where it might be necessary (or at least a lot more elegant) to use a CSS selection. This includes when...
- you can't select a Next button
- a Next button stays selected on the last page and results in the project never end
- you need data, such as latitutde and longitude, from a map where it isn't readily available
- hidden elements or previous data are being selected
- different pages on an eCommerce website have different page layouts
How to enable CSS selection
To use CSS to select an element, you have to edit the options of a pre-existing Select or Relative Select command.
1. Click on the Select or Relative Select in the list of commands in your project to select it as the active command.
2. Click on the green Edit button beside Selection Node.

3. Click on Use CSS Selection, which should cause the Selector text box to appear.

4. This textbox is where you can input a CSS path to select elements on the page.

Can you enable CSS with a Relative Select?
Yes, however, the command will no longer be relative. CSS selectors are always select from the entire page.
Rooted Selection
When you use CSS you’ll see a “Rooted Selection” checkbox appear below. Rooted Selection refers to treating the selection as relative to the top of the document rather than to the nearest parent selection.
If enabled, it will select every element on the page instead of within the container that you are currently in.
How to Write in CSS
To use CSS, you need to understand some of the basics of HTML first. CSS selects elements based off of the tags and the attributes of those tags on the page. You can see some simple page layouts here.
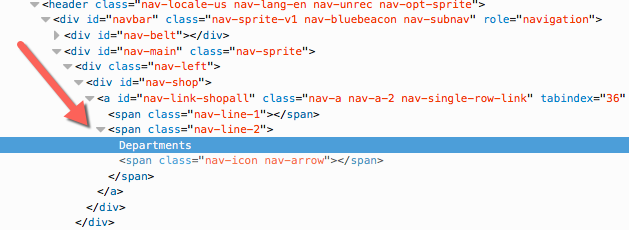
You might notice that ParseHub already tells you what tags any given selection is using.

This a refers to a link on the page, in an HTML <a> tag. The link itself is contained in the href attribute.

You might have already noticed the href attribute mentioned if you use an Extract command on a selected link.
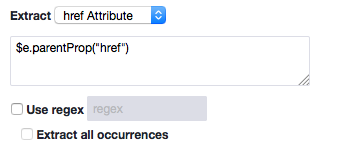
CSS, however, doesn't extract elements, it only selects them.
Viewing a Page's HTML
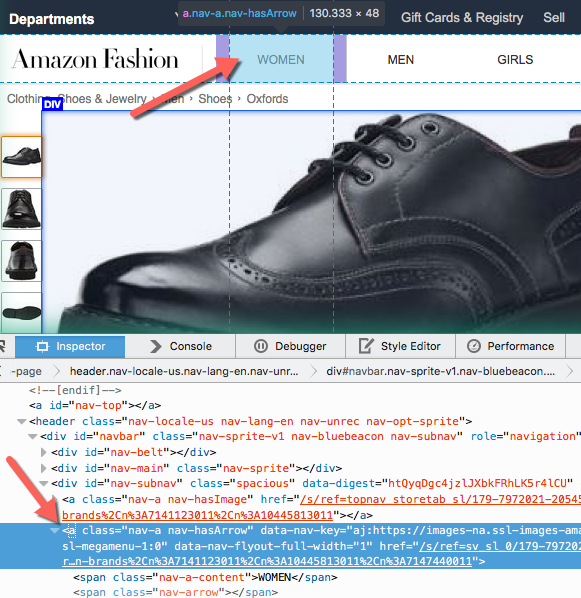
On any page, you can right click and choose Inspect Element in ParseHub to view the HTML layout of the page. This is important to do, so that we can design CSS to pick out the element we want.
Right clicking on the particular element, if you can find it, and inspecting that element will take you to its tag's location in the HTML.
If you hover over tags in the HTML view, the page will highlight the element that your cursor is hovering over.
The Language of CSS
This tutorial is just going to go into the basis of CSS with the use it has in ParseHub in mind. Of course, there are many many more uses and features in CSS that you can look into and use in ParseHub.
Selecting all elements
To select all tags of one type, use: tag
You should avoid typing this in for div or span tags because it can select many elements, causing ParseHub to crash. You should write your predicate first, something we'll learn about later.
For example, to select all the links on the page, use a
Selecting all children
HTML elements are nested, as you can see:
Sometimes selecting every single kind of element isn't what we want to do, because we might only want links (a tags) that are in a particular section (a div tag, here).
We can write this: div a
This translate to: "Select all a tags that are somewhere nested underneath a div tag." You can see here what would be selected, and what wouldn't be:
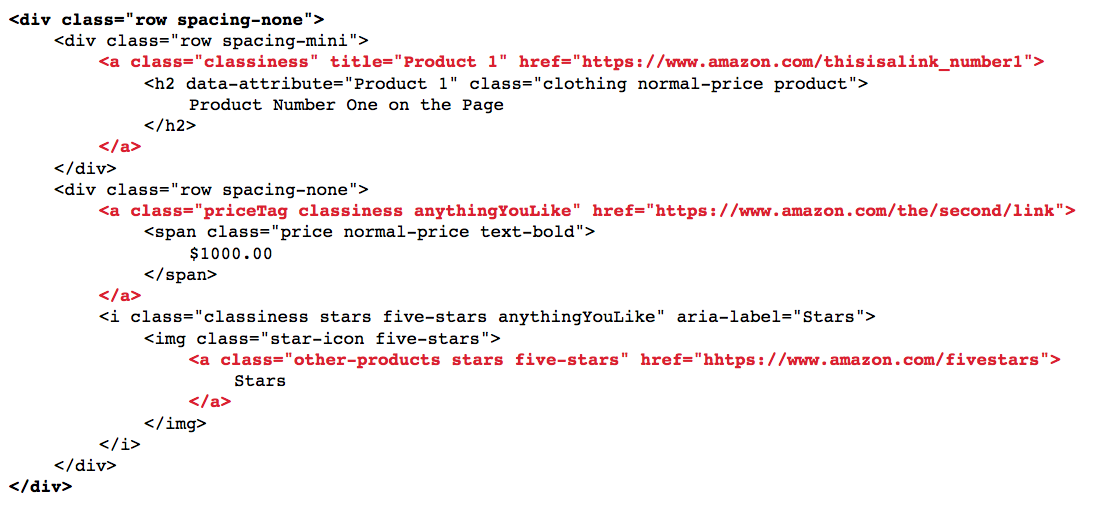
In red are the selected elements. Bolded is the first div that CSS recognizes they are nested under.
Filtering elements based on attributes
We can use class selectors to narrow down our selection even further. For instance, we might only want to get all links that have a class attribute of "class". We can write this:
a.class
The period followed by text specifies a class of the tag being selected. The same thing can be done with # instead of . for id attributes.
We can write:
a.anythingYouLike
This is a big jump, because it can really let us pick out one element at a time, as long as each tag has a unique class.
Selecting elements by immediate children
We've been using a space to select descendants so far, because the right arrow > has a special feature in CSS. It will only select children exactly one level down.
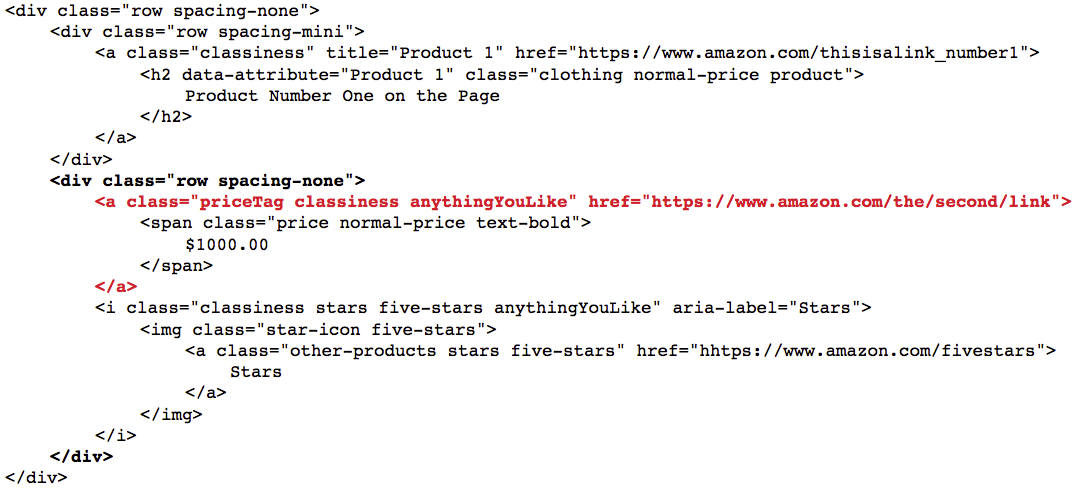
In the code below, div>a will select only the highlighted immediate child of the div tag, but none of the a tags further down.
When the Tag Doesn't Matter
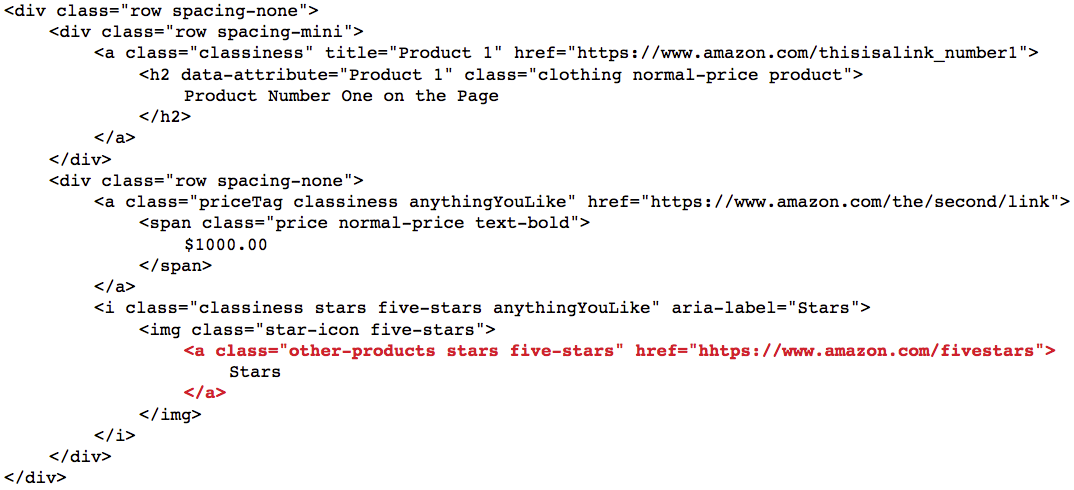
Sometimes you just need to select an element based on the predicate, and not the tag. This can come up if you need several tags of different types. You can use the symbol * instead of a tag to specific any element
*.other-products will select the highlighted
Final Tips
Good job on getting through all of this technical stuff! At the end of the day, using CSS with ParseHub takes practice, and trial and error.
If you need help, you can always Contact Us and our help team will get back to you as soon as possible!
