On most websites, the <meta> HTML tag is used to describe a web page's content to make it easy for search engines to categorize them. Selecting this tag using regular ParseHub selection is not possible due to the fact that this tag is not displayed on the website. However, we can still select these tags using ParseHub using other selection methods - namely, CSS and XPath selectors.
For this tutorial, we will be scraping meta data from the main Amazon webpage.
Selecting and Extracting a specific <meta> tag
1. In order to turn on CSS/XPath selection, we first need to select an element on the page using regular ParseHub selection so that we can edit our Selection node. Using a Select command, select any element on the webpage by clicking on it. Now click on the "Edit" button under your Selection node. This will allow you to change the type of selection you are doing to a CSS/XPath selection.
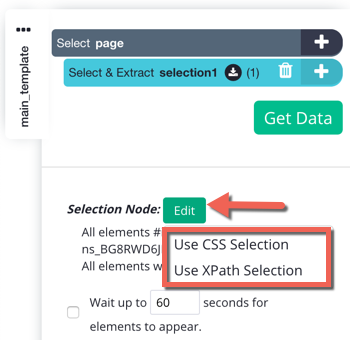
Note: CSS selectors cannot make selections in the <head> section of the HTML. If the <meta> tags that you want to select are in the <head> section, you'll have to use XPath.
2. Now, we want to take a look at the webpage's HTML to determine the correct selector to use for the information that we want to extract. First switch to Browse mode so that we can interact with the website as if we were in a regular web browser.

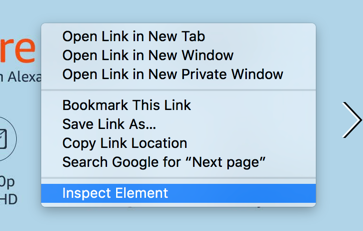
Now, right-click on the interactive view of the website, and choose the "Inspect Element" option from the menu.
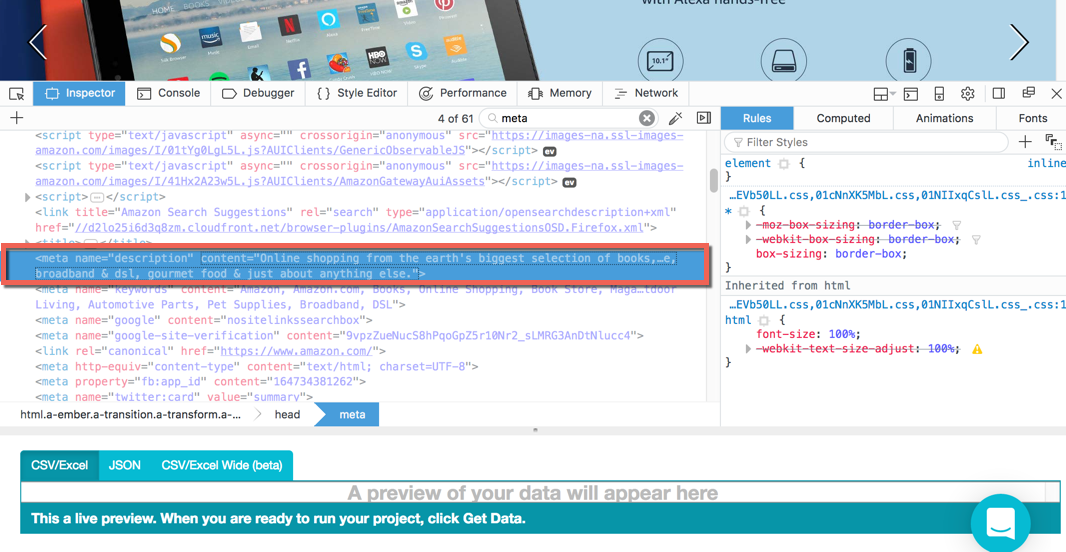
3. You will now see a pane appear above your results preview pane showing you the HTML code of the website. You can use this pane to find the <meta> tag(s) that you want to select. For this example, we are going to be extracting the <meta> pictured below.
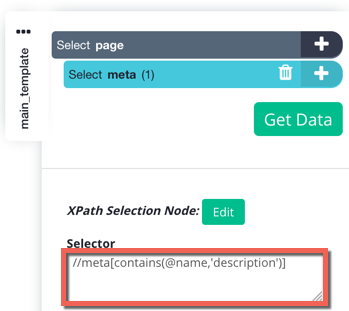
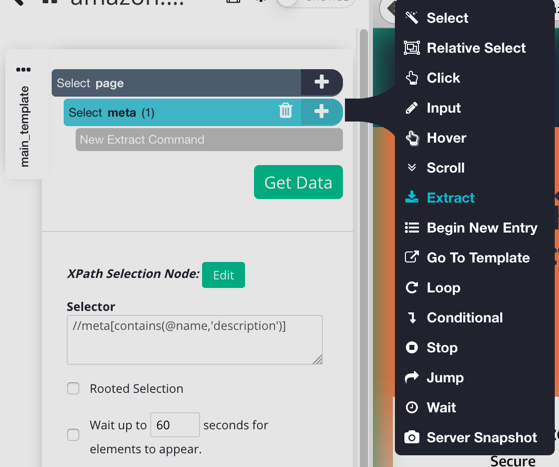
4. Using an XPath selector, we are going to select the specific <meta> tag that we want to select. For this particular tag, we can use the XPath selector //meta[contains(@name,'description')], since each <meta> tag has its own specific name (If this element was in the <body> you could have used the CSS selector meta[name=description]). Enter your selector into the "Selector" text box under your commands.
5. To actually extract the HTML code the <meta> tag we've selected, we will need to add an Extract command to our project. To do this, click on the + button next to "Select meta", click on advanced, and then choose an Extract command from the toolbox.
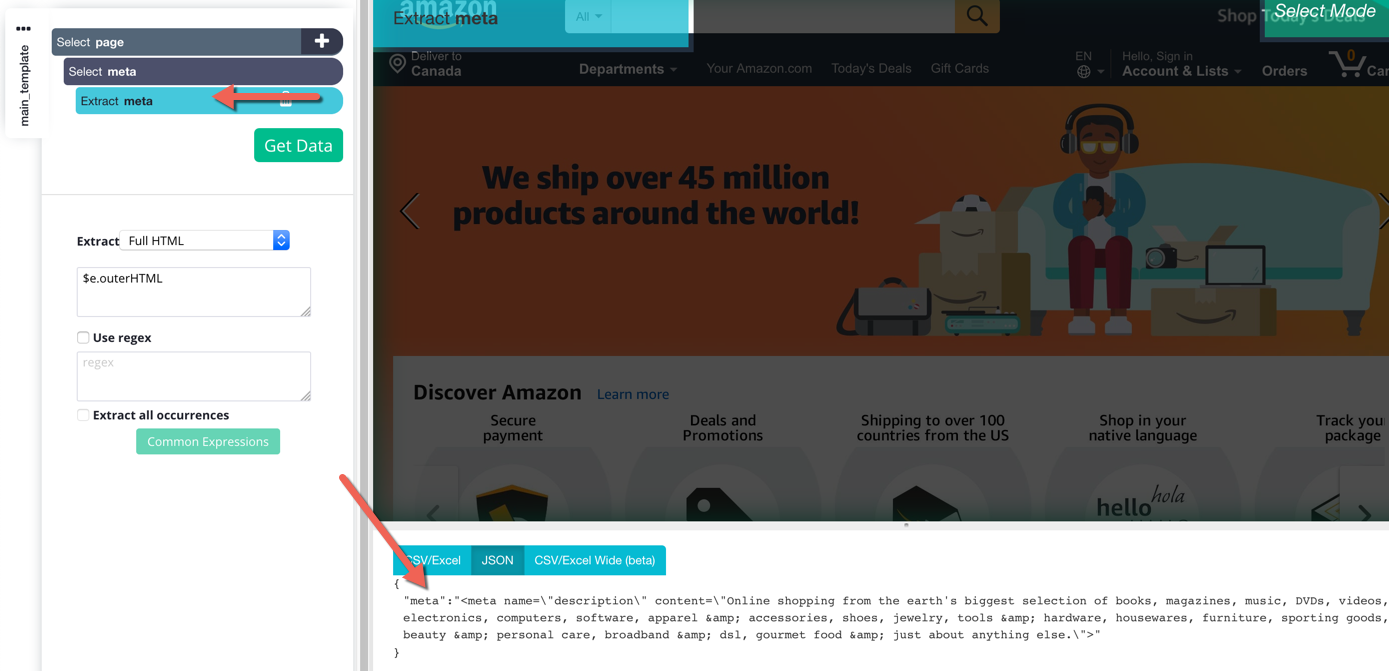
In your Extract command's settings, choose "Full HTML" from the dropdown menu. You'll see that the HTML code of the <meta> tag that we've selected is now being extracted.
Selecting and Extracting multiple <meta> tags
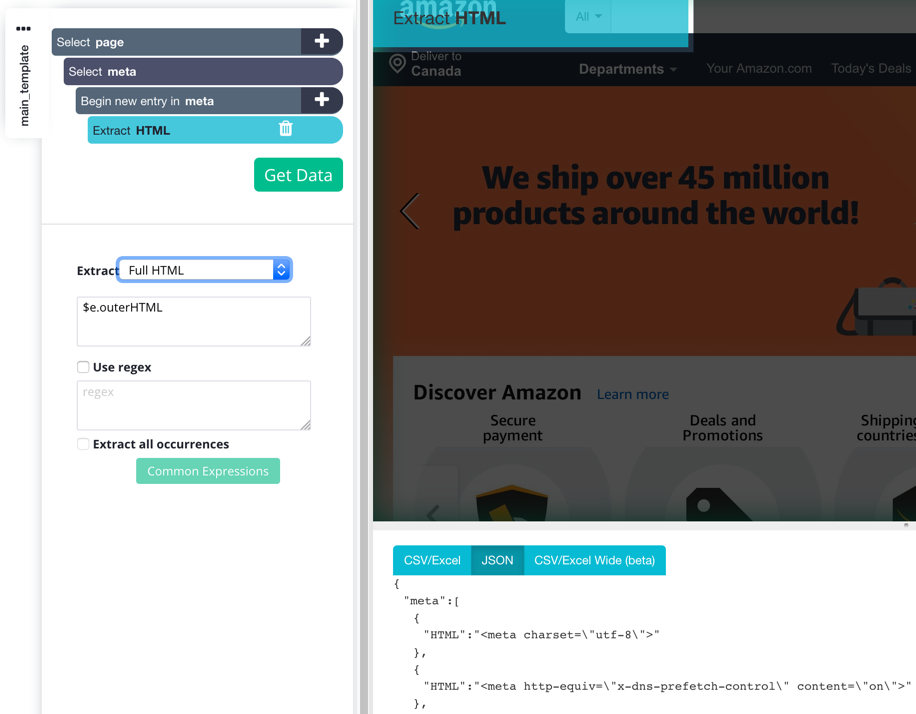
In this example, we are going to be extracting the HTML code for all <meta> tags on our webpage. We can use the XPath selector //meta to select all <meta> tags (If this element was in the <body> you could have used the CSS selector meta).
1. After you've selected all of your meta tags, click on the + button next to "Select meta", click on advanced, and add a Begin new entry command.
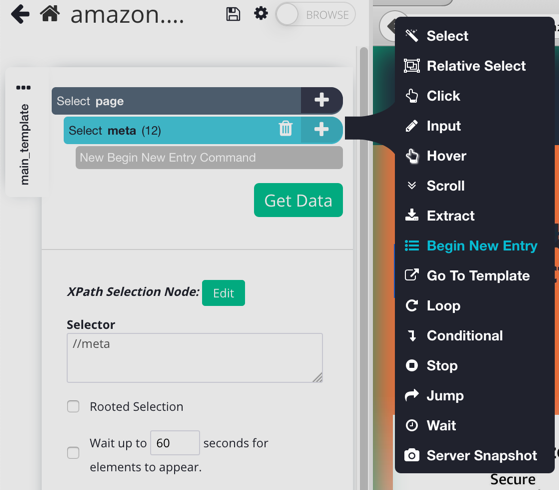
We added this command so that we can extract the HTML of all of our <meta> tags. Without this command, the extracted data for each <meta> tag will overwrite the previous extraction.
2. Now, we can extract the data behind the <meta> tags. We can do this by adding an Extract command to our project. Do this by clicking on the + button next to our Begin new entry command.
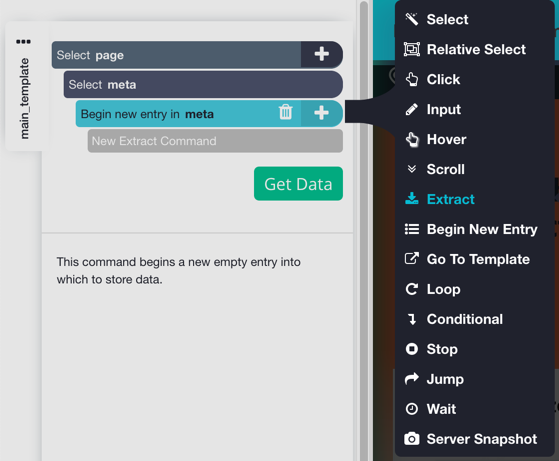
3. Like before, change your Extract command's settings to extract the "Full HTML" of your tags. You'll now see that the HTML of each <meta> tag is being extracted from your website.
That's how you select meta tags! This tutorial went through a very simple example, but at the end of the day, using CSS and XPath with ParseHub takes practice, and trial and error.
If you need to remove some of the extraneous HTML bits from your extractions, check out our tutorial on cleaning up your data.
